Advanced Mode
Introduction to

Welcome to Voila, your all-in-one solution for courier label creation, tracking, and shipping automation. This guide will walk you through the essential steps to set up your API account, install couriers, and create smart shipping rules.
Voila acts as a translator between your business and courier services, simplifying complex API requests and standardising responses across different courier platforms.
Simplifies Shipping & Maximises Efficiency
At Voila, we handle the complexity of courier integrations so you don’t have to. Our system translates your shipping requests into the various formats required by couriers, standardising their responses to ensure consistency and ease of use.
With intelligent shipping automation, you can seamlessly switch couriers based on key factors like weight, postcode, collection times, or even location type — Voila helps you with the following:
⚙️ No IT Integration Hassles – If a new courier offers better rates, you can onboard them instantly. Our pre-built APIs eliminate the need for costly development, allowing you to start shipping immediately.
⚡ Optimise Costs & Delivery Speeds with Smart Rules, take full control of your shipping strategy with Smart Rules, an intuitive system that dynamically selects the best courier based on key parameters like cost, speed, weight, postcode, and pickup times.
🔒 Secure & Scalable API – We safeguard your courier credentials by registering each account with a friendly name ("auth"), preventing sensitive data from being transmitted. Whether you manage a single site or multiple locations, our system ensures your requests are routed correctly and securely.
🛡️ Security Is Our Top Priority – every interaction is encrypted using advanced HTTPS protocols, protecting your data with the highest standards of online safety.
At Voila,Voila, we’re here to streamline your shipping, save you time, and help you scale effortlessly. Let’s simplify logistics together. 🚛
🚀 Quick Start Guide: Setting Up Postman & Voila API
To install Postman, visit the official Postman website at Postman Downloads. Once there, you'll find the download button to choose the version compatible with your operating system—whether it's Windows, macOS, or Linux. After downloading the installation file, locate it in your designated download directory and install it by following the on-screen instructions.
If you haven't already done so, please create a Postman account to access its full features and services. You can quickly sign up for an account by visiting the Postman signup page at Postman Account Signup. Once you've installed Postman and created an account, you can efficiently utilise Voila.
🛠 Installing Postman
-
Download Postman: Visit the Postman Downloads page and choose the version for Windows, macOS, or Linux.
-
Install Postman: Locate the downloaded file and follow the on-screen installation instructions.
-
Create an Account: Sign up at Postman Account Signup to access all features.
⚙️ Setting Up Postman for Voila API
-
To accessImport thedocumentationDocumentation:forVisit theVoila, visitVoilathisAPIpagedocumentation -
Click
the "‘Run inPostman"Postman’button(top-rightincorner of thescreen'sscreen).top right corner. -
Select Your Platform: Choose
the second option and select"Postman for Windows/Linux/MacmacOS."OS." -
Pick
youraworkplaceWorkspace:forSelectimportingwhere to import the collection andconfirmconfirm.your selection. Uponcompletion,Access
you'llAPI Calls: Once imported, find the Voila API calls and examples inyourPostman.Postman account.

🔑 Creating an API Account Using(GUI GUIMethod)
Before diving into features, settingSetting up youran API account withinin Voila is essential. This account, is the foundationkey ofto yourmanaging shipments efficiently, it enables access to shipping operations, allowing you to access and utilise the platform's tools effectively. Fromlike label creation toand shipmenttracking. tracking, everythingEverything starts withhere, your API account. It's the first step towards optimisingstreamlining your logistics process.from the get-go.
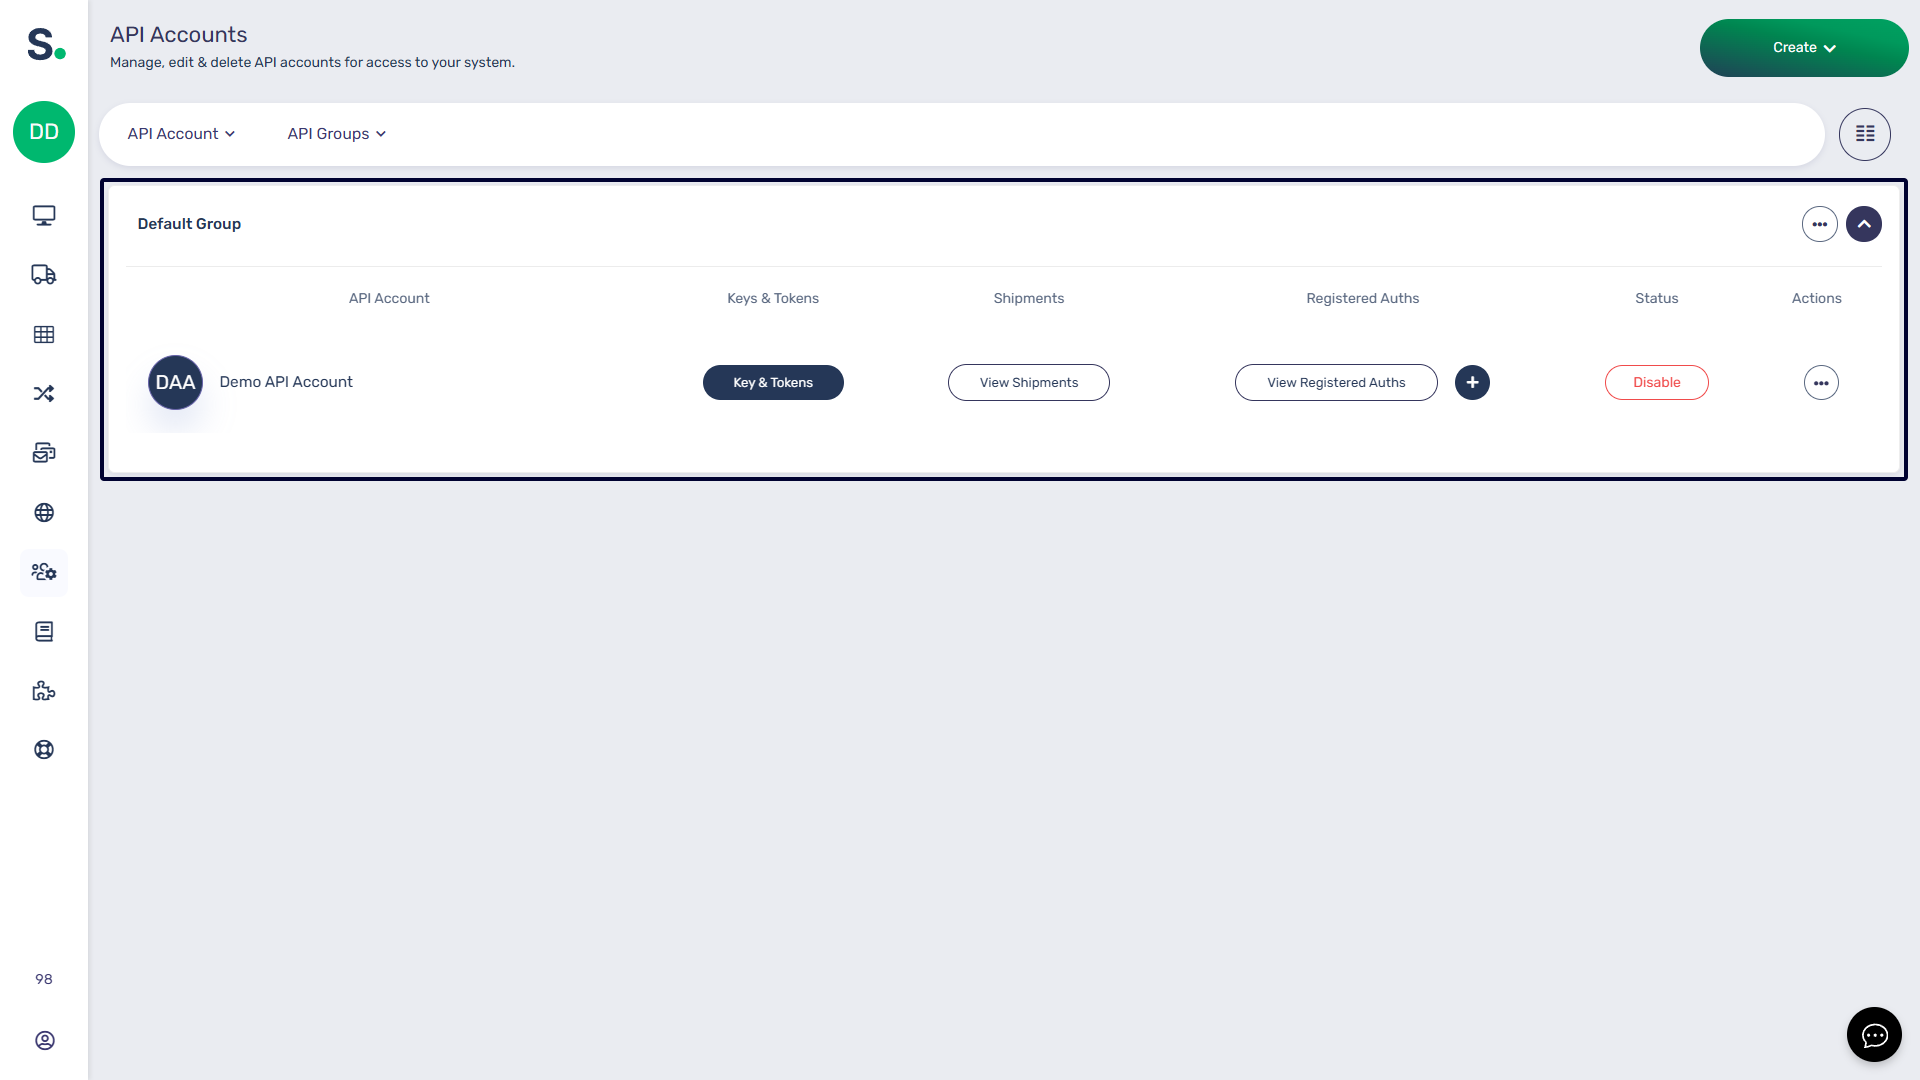
🗂 API Accounts page:Overview:
-
API Account: Displays
theaccountnamenames.of your API account. -
Keys & Tokens:
View andView/regenerateyourAPIkeyscredentials.and tokens here. -
Shipments:
Access a list ofTrack all shipments sent via thisAPIaccount.account. -
Registered Auths: Manage
allcourierintegrationsintegrations.for this API account. Add new integrations or manage existing ones. -
Status:
Activate orActivate/deactivatetheAPIaccountaccounts.as needed. -
Actions: Move
theaccountsAPIbetweenaccount to a different API groupgroups or deletethethem.account.
Refer to our dedicated📌 For detailed setup, check the API Accounts documentationDocumentation. for detailed guidance on setting up your API account and obtaining your token.
Before configuring your collection variables in Postman, you must refer to the API Accounts documentation page for setup instructions on creating an API account. Once you have set up an API account, you can retrieve the necessary "api-user" and "api-token" variables from there.
🔧 Configuring Postman Collection Variables in Postman
After obtaining your API username and token, configuringset them up in PostmanPostman. is the next step. By savingStoring them as collection variables,variables yousimplifies canrequests simplifyand eliminates the processneed and avoidfor repeated entriesentries. whenSince calling API endpoints. Postman will retain this information, allowing you to focus solely on making endpoint calls. Thesethese keys are already registeredincluded in the collection;collection, youupdate havethem toas edit them.needed.
NavigateGo to
collection).the‘Variables’"Variables"(centretab atof thescreen's centrescreen when viewing thecollection.InputtheEnter
Credentials:requiredAPIinformation as follows:-
Variable:
api_url- →
Initial Value:https://production.courierapi.co.uk-
Variable:
api-user→ (Your API username) -
Variable:
api-token→ (Your API token)
-
:Variable:Retrieve API Detailsapi-userInitialValue:Find
Insertapi-useryour API usernameTo find the API username, go to theunder "API Accounts"page and locate the name under the→ "API Account" column.
Variable:Find
api-tokenInitial Value:Insert your API tokenTo obtain the API token, visit the "API Accounts" page. Once you click the button highlighted in theunder "Keys & Tokens"column, the token will be located at the bottom of the window that pops up, under the "Token"column.
-
-
Click
corner).the‘Save’"Save" button in the screen's top(top-rightcorner.

📡 Creating an API Account Using(API the APIMethod)
TheSetting initial step to familiarise yourself with the API is creatingup an API account viathrough the API interface.interface Thisis straightforwarda simple process facilitatesthat futureenhances workflow organisation,efficiency, mainlyespecially when collaborating with multiple team members across variousdifferent locations.
ExpandtheGo
"to ‘Account &Management"Management’folder,foldertheninchoosePostman."-
Select ‘Create a New API
User"User’.on the left side of your screen. -
Customise the
requestRequest:according to your preferences. For instance, you may specify onlyEnter the"name"namefieldwhile(otherremovingfieldsothers.areVoilaoptional).will then generate a key and token for you. -
Click ‘Send’ (top-right corner).
-
Retrieve API Keys from the
"Send"response.button at the screen's top right corner. TheresponseConfirm
toAPIyourAccountrequestinwillVoilaappear at the bottom of the page. You can save this information for later use.Navigate tounder "APIAccounts"Accounts."within Voila to view the newly created API account in the graphical user interface (GUI).

Getting a List of Couriers
To view the available couriers along with their names and details,
you can utilizeutilise this endpoint to access all pertinent information.information It ison how couriers are identified within the API and how to reference them later.
Follow these steps:
- Expand the "Account & Management" folder, then select "List Couriers" from the left-hand menu.
- Click "Send" to submit the request.
- The request-response contains a list of available couriers. Each courier is identified by the string contained within the "key" attribute.
🚚 Retrieving a List of Couriers
Utilise this endpoint to obtain key details on courier identification within the API and how to reference them later.
-
Expand ‘Account & Management’.
-
Select ‘List Couriers’.
-
Click ‘Send’.
-
View Response: The list of couriers is displayed with unique keys.

📜 Displaying Required Courier Parameters
Before proceeding to install couriers, it's essential to understand the parameters and information they require for installation. You can easily accomplish this by following these steps:
-
Expand
the "‘Account &Management"Management’.folder, -
navigateSelect
to "‘Get AuthRules"Rules’.in the left-hand menu. AdjusttheModify URL with the courier
forkey:which you need information. Replace the courier key in the middle as indicated:{{api_url}}/API/couriers/v1/ENTER-YOUR-COURIER-KEY-HERE/HERE/register-auth-rules
-
Click
the‘Send’."Send" button at the page's top right corner. TheView Required & Optional Parameters - the request-response contains the required and optional keys and their expected values, whether strings,
integers,integers or dictionaries.

Installing a Courier Through the API
Now that you know the fundamentals of API user setup and couriers, let's guide you through creating your initial courier connection. Each API account can independently install couriers, ensuring that courier connections remain distinct to each account. This meticulous level of control empowers you to tailor your shipping configuration to the specific requirements of your business segments.
To install a courier via the API, follow these steps:

📦 CreatingInstalling Smarta RulesCourier via API
OnceNow you'vethat setyou upknow the fundamentals of API user setup and couriers, let's guide you through creating your initial courier services,connection. theEach nextAPI stepaccount iscan independently install couriers, ensuring that courier connections remain distinct to configureeach smartaccount. shipping.
Smartmeticulous shippinglevel offersof businessescontrol an efficient approach to managing logistics and parcel delivery operations. It also simplifies selecting carriers and services based on predefined criteria using a user-friendly interface and API integration.
Within the smart shipping interface,empowers you can create rule groups and smart rules to tailor your shipping strategiesconfiguration to the specific needs.requirements Itof allowsyour business segments.
-
Expand ‘Account & Management’.
-
Select ‘Register Auth’.
-
Modify Request Data with the courier’s specific details.
-
Click ‘Send’.
-
Verify Response for
precisesuccess.control -
Check Installed Couriers in Voila under "API Accounts."
🤖 Creating Smart Rules
Smart shipping methodologies,enables cateringautomated tocarrier diverseselection customerbased preferenceson andpredefined optimising efficiency.rules.
-
ToAccesslearnthehowSmarttoShipping Interface. -
Create Rule Groups & Smart Rules based on shipping parameters.
-
Optimise Costs & Delivery Speeds through automated courier selection.
📌 For a step-by-step guide, check the Smart Shipping Documentation.
You’re now set up Smartwith shipping,Postman visitand the![]() API!
API! dedicated guide🚀 onHappy thisshipping! page.