**Click to Play or Pause the Video**
### **Creating a Template** To initiate the creation of a new template, click on the "Create Template" button in the top-right corner of the page. This action will lead you to a fresh, blank template page. Your initial step should be naming your template, which can be done through the page's top-left corner.**Click to Play or Pause the Video**
### **Variables & Usage** You'll access a JSON-structured list of variables by clicking the "Variables & Usage" button, conveniently located next to the naming field. This functionality enables you to incorporate shipment data seamlessly into your template content by inserting these variables. For practical guidance on utilising variables and implementing loops, refer to the provided examples in the "Usage" tab. - **Example Variable:** - `Your Tracking Code with {$courier} is {$trackingCode}. It will arrive at {$shipment->ship_to->postcode}.` - **Example Loop:** - `{foreach $items as $item} You ordered {$item->quantity} of {$item->description}{/foreach}` It's important to note that we employ Smarty 3 as the template engine for this process. For a more in-depth understanding, you can find further details in the [Smarty 3 Documentation](https://www.smarty.net/docs/en/).**Click to Play or Pause the Video**
### **Email Editor** Observing the multitude of tools and elements available on the right-hand side of the page, it becomes evident that these resources are instrumental in simplifying crafting your email content. Let's delve into how to harness these tools to construct your preferred template. You have two options for utilising these elements: 1. **Drag & Drop:** You can drag and drop one of the elements from the "Content" section into the blue box. 2. **Select & Add:** Alternatively, click the blue box and choose the desired element from the available options.**Click to Play or Pause the Video**
### **Content** The "Content" section comprises two categories: "Basic" and "Pre-made" blocks, each offering various elements for crafting your email templates. **Basic:** - **Text:** This element adds a text box to your template, enabling text input and editing via the tools displayed atop the text box and within the right-hand "Content" section. - **Image:** You can incorporate images into your email template using this element. After adding it, customise the image box by uploading it from your computer or selecting a free stock image from Pexels. Options include creating folders, selecting and deleting images in the file manager, and additional settings in the "Content" section. - **GIF:** This element allows you to add GIFs to your email template. You can change the default GIF by clicking on the image box and choosing from options like GIPHY or providing a custom source URL. - **Button:** Use this element to add clickable buttons linked to URLs. Button text, link, shape, and colour options are available in the "Content" section. - **Divider:** Add dividers to separate content within your template. Customise line style, colour, and background colour by clicking on the divider element. - **Spacer:** This element inserts space between other template elements. You can adjust the spacer height and background colour. - **Social:** This element incorporates social media icons into your email template. You can customise icon styles, sizes, and padding and even upload custom icons. The "Is Share URL" option streamlines social media sharing by pre-populating messages and images. - **Video:** Add videos from YouTube or Vimeo by entering the respective links. - **HTML:** Embed HTML code into your email template using this element. Access the HTML Content section for code input. **Pre-made:** - **Header:** Drag and drop the "Headline" to insert a headline, allowing HTML code input for customising the header. - **Content:** This option provides predefined Title, Paragraph, Buttons, and Divider elements for easy inclusion in your template. - **Footer:** By dragging and dropping "Company Footer," you can add a predefined footer to your template. Additionally, there are "Structure" and "Setting" sections. The "Structure" option lets you choose from predefined design structures, such as one, two, three, or four elements in a row, simplifying the placement of your desired elements. In the "Setting" section, you can access a list of settings applicable to the entire template, not just specific elements, streamlining global adjustments to your template's appearance and behaviour.**Click to Play or Pause the Video**
### **Options** Located on the top bar, you'll find essential buttons to enhance your template design experience: - **Redo & Undo:** These buttons empower you to redo or undo your actions, ensuring precise control over your template's evolution. - **Preview:** By clicking this button, you can visualise your template in a rendered state, precisely as it would appear to your customers. - **Save:** The save button is crucial on the far right side of the bar. Your template changes remain unsecured until you click this button. Once saved, you can revisit your templates anytime to view your creation. - **Options:** Once you're back at the templates page, clicking the options button reveals a menu offering choices like copying, editing, and deleting your template. Copying simplifies template creation by allowing you to retain the parts you need for your new template, saving you valuable time and effort.**Click to Play or Pause the Video**
### **An Example Email Template** We've designed a basic email template example that can provide you with valuable insights. Below, we'll break down the elements used and their order to simplify replicating or creating a similar email template with a comparable structure. **1. Header with Company Logo:** - We've incorporated a picture field at the top, where you can insert your company's logo and adjust its size. **2. Divider:** - We've added a divider below the company logo to create a visual separation between sections. **3. Personalised Message Text Field:** - In the next section, you'll find a text field. It is where you can include a meaningful message using available variables. These variables fetch data for each order, enabling you to craft personalised emails for each customer. **4. Divider:** - Another divider follows the personalised message section, maintaining visual clarity. **5. Social Media Links and Additional Text Field:** - The subsequent section combines both text and social media fields. Here, we've customised the social media links for our company. You can easily modify this field to include as many platforms as possible. Furthermore, if you wish to include a platform unavailable in the presets, you can upload a custom logo and tailor it to your needs. With just a few straightforward steps, our user-friendly graphical interface empowers you to create visually appealing and personalised emails that resonate with your customers. [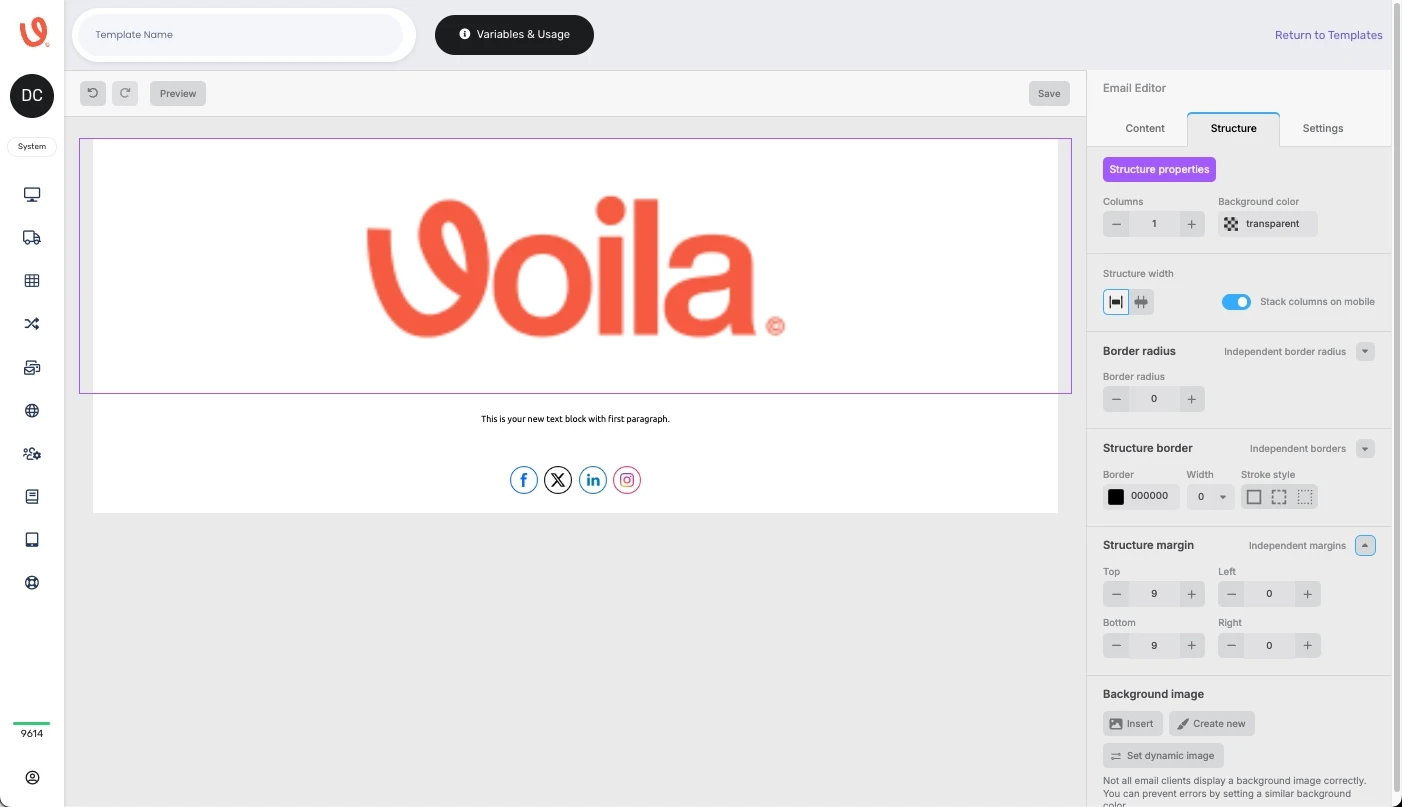](https://shipping-documentation.despatchcloud.app/uploads/images/gallery/2025-03/ck7testing.webp)