# Advanced Mode

## <span style="color: rgb(245, 90, 64);">**<span style="color: rgb(245, 89, 64);">Introduction</span> to** </span><span style="color: rgb(245, 90, 64);">**[![Voila.png](https://shipping-documentation.despatchcloud.app/uploads/images/gallery/2025-02/scaled-1680-/tT4voila.png)](https://shipping-documentation.despatchcloud.app/uploads/images/gallery/2025-02/tT4voila.png)**</span>

Welcome to <span style="color: rgb(245, 89, 64);">**Voila**</span>, your all-in-one solution for **courier label creation, tracking, and shipping automation**. This guide will walk you through the essential steps to set up your **API account, install couriers, and create smart shipping rules**.

<span style="color: rgb(245, 89, 64);">**Voila**</span> acts as a **translator** between your business and courier services, simplifying complex **API requests** and standardising responses across different courier platforms.

### <span style="color: rgb(245, 90, 64);">**[![Voila.png](https://shipping-documentation.despatchcloud.app/uploads/images/gallery/2025-02/scaled-1680-/tT4voila.png)](https://shipping-documentation.despatchcloud.app/uploads/images/gallery/2025-02/tT4voila.png)**</span> **<span style="color: rgb(245, 90, 64);">Simplifies Shipping &amp; Maximises Efficiency</span>**

At <span style="color: rgb(243, 103, 68);">**Voila**</span>, we handle the complexity of courier integrations so you don’t have to. Our system translates your shipping requests into the various formats required by couriers, standardising their responses to ensure consistency and ease of use.

With **intelligent shipping automation**, you can seamlessly switch couriers based on key factors like **weight, postcode, collection times, or even location type** — <span style="color: rgb(243, 103, 68);">**Voila**</span> helps you with the following:

⚙️ **No IT Integration Hassles** – If a new courier offers better rates, you can onboard them instantly. Our pre-built APIs eliminate the need for costly development, allowing you to start shipping immediately.

⚡ **Optimise Costs &amp; Delivery Speeds with Smart Rules,** take full control of your shipping strategy with **Smart Rules**, an intuitive system that dynamically selects the best courier based on key parameters like **cost, speed, weight, postcode, and pickup times**.

🔒 **Secure &amp; Scalable API** – We safeguard your courier credentials by registering each account with a **friendly name ("auth")**, preventing sensitive data from being transmitted. Whether you manage a **single site or multiple locations**, our system ensures your requests are routed correctly and securely.

🛡️ **Security Is Our Top Priority** – every interaction is encrypted using advanced HTTPS protocols, protecting your data with the highest standards of online safety.

At <span style="color: rgb(243, 103, 68);">**Voila**</span>, we’re here to **streamline your shipping, save you time, and help you scale effortlessly**. Let’s simplify logistics together. 🚛

### **<span style="color: rgb(243, 103, 68);">Quick Start Guide: Setting Up Postman &amp; </span>**<span style="color: rgb(245, 90, 64);">**![Voila.png](https://shipping-documentation.despatchcloud.app/uploads/images/gallery/2025-02/scaled-1680-/tT4voila.png) API**</span>**<span style="color: rgb(243, 103, 68);">  
</span>**

#### **<span style="color: rgb(243, 103, 68);">🛠<span style="color: rgb(245, 89, 64);"> Installing Postman</span></span>**

1. **Download Postman**: Visit the [Postman Downloads](https://www.postman.com/downloads/) page and choose the version for Windows, macOS, or Linux.
2. **Install Postman**: Locate the downloaded file and follow the on-screen installation instructions.
3. **Create an Account**: Sign up at [Postman Account Signup](https://identity.getpostman.com/signup) to access all features.

#### **⚙️<span style="color: rgb(245, 89, 64);"> Setting Up Postman for </span>**<span style="color: rgb(245, 90, 64);">**[![Voila.png](https://shipping-documentation.despatchcloud.app/uploads/images/gallery/2025-02/scaled-1680-/tT4voila.png)](https://shipping-documentation.despatchcloud.app/uploads/images/gallery/2025-02/tT4voila.png)**</span>**<span style="color: rgb(245, 89, 64);"> API</span>**

1. **Import the Documentation**: Visit the [<span style="color: rgb(243, 103, 68);">Voila </span>API documentation ](https://api.courierapi.co.uk/)and save it to your Postman account.
2. **Click ‘Run in Postman’** (top-right corner of the screen).
3. **Select Your Platform**: Choose "Postman for Windows/Linux/macOS."
4. **Pick a Workspace**: Select where to import the collection and confirm.
5. **Access API Calls**: Once imported, find the **<span style="color: rgb(243, 103, 68);">Voila</span>** API calls and examples in Postman.

  
<video controls="controls" height="511" src="https://shipping-documentation.despatchcloud.app/attachments/217?open=true" style="width: 884px; height: 511px;" width="884"></video>

<p class="callout info">**Click to Play or Pause the Video**</p>

#### **🔑 <span style="color: rgb(243, 103, 68);">Creating an API Account (GUI Method)</span>**

Setting up an API account in <span style="color: rgb(243, 103, 68);">**Voila**</span> is the key to managing shipments efficiently, it enables access to shipping tools like label creation and tracking. Everything starts here, streamlining your logistics from the get-go.

1. **Navigate to API Accounts** in <span style="color: rgb(243, 103, 68);">**Voila**</span>.
2. **Create Groups (Optional)** for managing multiple locations.
3. **Install Couriers Per Account** to keep settings unique.

##### **🗂<span style="color: rgb(245, 89, 64);"> API Accounts Overview:</span>**

- **API Account**: Displays account names.
- **Keys &amp; Tokens**: View/regenerate API credentials.
- **Shipments**: Track all shipments sent via this account.
- **Registered Auths**: Manage courier integrations.
- **Status**: Activate/deactivate API accounts.
- **Actions**: Move accounts between groups or delete them.

📌 **For detailed setup, check the** [**API Accounts Documentation**](https://shipping-documentation.despatchcloud.app/books/api-accounts/page/api-accounts "API Accounts Voila")**.**

<p class="callout warning">Before configuring your collection variables in Postman, you must refer to the [API Accounts documentation page](https://shipping-documentation.despatchcloud.app/books/api-accounts/page/api-accounts) for setup instructions on creating an API account. Once you have set up an API account, you can retrieve the necessary "api-user" and "api-token" variables from there.</p>

[![Creating-an-API-Account-GUI-Method.webp](https://shipping-documentation.despatchcloud.app/uploads/images/gallery/2025-02/scaled-1680-/creating-an-api-account-gui-method.webp)
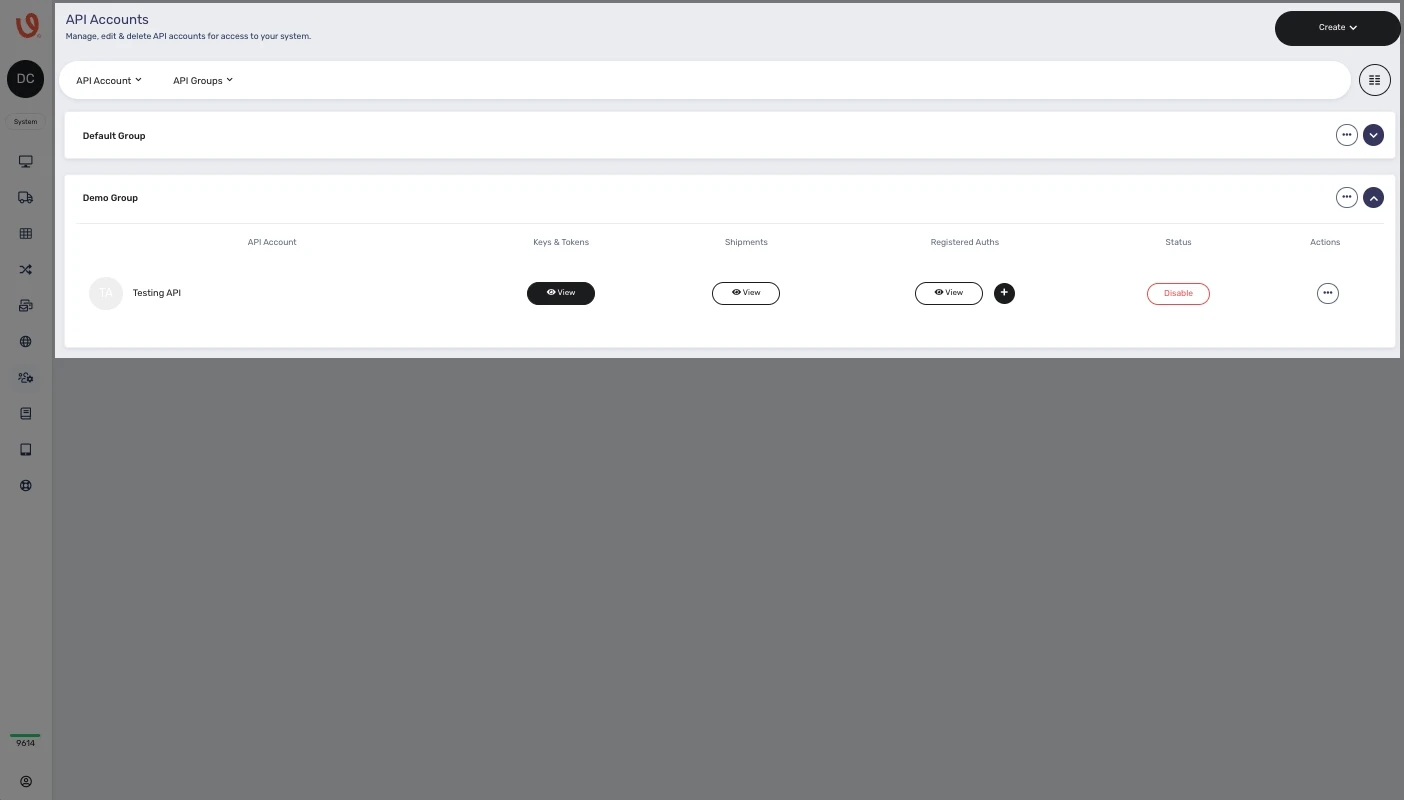
](https://shipping-documentation.despatchcloud.app/uploads/images/gallery/2025-02/creating-an-api-account-gui-method.webp)

####  **🔧 <span style="color: rgb(243, 103, 68);">Configuring Postman Collection Variables</span>**

After obtaining your API username and token, set them up in Postman. Storing them as collection variables simplifies requests and eliminates the need for repeated entries. Since these keys are already included in the collection, update them as needed.

1. **Go to ‘Variables’** (centre of the screen when viewing the collection).
2. **Enter API Credentials**:
    
    
    - **Variable:** `api_url` → [`https://production.courierapi.co.uk`](https://production.courierapi.co.uk)
    - **Variable:** `api-user` → *(Your API username)*
    - **Variable:** `api-token` → *(Your API token)*
3. **Retrieve API Details**:
    
    
    - Find `api-user` under "API Accounts" → "API Account" column.
    - Find `api-token` under "Keys &amp; Tokens" column.
4. **Click ‘Save’** (top-right corner).

[![](https://documentation.despatchcloud.com/uploads/images/webp/Shipping/Shipping_SG_Advanced_SettingGlobalVars.webp?t=1722349428)](https://documentation.despatchcloud.com/uploads/images/webp/Shipping/Shipping_SG_Advanced_SettingGlobalVars.webp?t=1722349428)

#### <span style="color: rgb(243, 103, 68);">**📡 Creating an API Account (API Method)**</span>

Setting up an API account through the API interface is a simple process that enhances workflow efficiency, especially when collaborating with team members across different locations.

1. **Go to ‘Account &amp; Management’** folder in Postman.
2. **Select ‘Create a New API User’.**
3. **Customise the Request**: Enter the `name` field (other fields are optional).
4. **Click ‘Send’** (top-right corner).
5. **Retrieve API Keys** from the response.
6. **Confirm API Account in Voila** under "API Accounts."

<video controls="controls" height="498" src="https://shipping-documentation.despatchcloud.app/attachments/218?open=true" style="width: 885px; height: 498px;" width="885"></video>

<p class="callout info">**Click to Play or Pause the Video**</p>

#### <span style="color: rgb(243, 103, 68);">**Getting a List of Couriers**</span>

<span data-preserver-spaces="true">To view the available couriers along with their names and details, </span><span data-preserver-spaces="true">you can utilise this endpoint to access all pertinent information on how couriers are identified within the API and how to reference them later.</span>

##### <span style="color: rgb(245, 89, 64);">**<span data-preserver-spaces="true">Follow these steps:</span>**</span>

1. <span data-preserver-spaces="true">Expand the "Account &amp; Management" folder, then select "List Couriers" from the left-hand menu.</span>
2. <span data-preserver-spaces="true">Click "Send" to submit the request.</span>
3. <span data-preserver-spaces="true">The request-response contains a list of available couriers. Each courier is identified by the string contained within the "key" attribute.</span>

#### **<span style="color: rgb(243, 103, 68);">🚚 Retrieving a List of Couriers</span>**

Utilise this endpoint to obtain key details on courier identification within the API and how to reference them later.

1. **Expand ‘Account &amp; Management’.**
2. **Select ‘List Couriers’.**
3. **Click ‘Send’.**
4. **View Response**: The list of couriers is displayed with unique keys.

[![](https://documentation.despatchcloud.com/uploads/images/webp/Shipping/Shipping_SG_Advanced_ListCouriers.webp?t=1722349428)](https://documentation.despatchcloud.com/uploads/images/webp/Shipping/Shipping_SG_Advanced_ListCouriers.webp?t=1722349428)

#### 📜 <span style="color: rgb(243, 103, 68);">**Displaying Required Courier Parameters**</span>

<span data-preserver-spaces="true">Before proceeding to install couriers, it's essential to understand the parameters and information they require for installation. You can easily accomplish this by following these steps:</span><span style="color: rgb(243, 103, 68);">  
</span>

1. **Expand ‘Account &amp; Management’.**
2. **Select ‘Get Auth Rules’.**
3. **Modify URL** with the courier key:   
    `{{api_url}}/API/couriers/v1/ENTER-YOUR-COURIER-KEY-HERE/register-auth-rules`
4. **Click ‘Send’.**
5. **View Required &amp; Optional Parameters -** the request-response contains the required and optional keys and their expected values, whether strings, integers or dictionaries.

[![](https://documentation.despatchcloud.com/uploads/images/webp/Shipping/Shipping_SG_Advanced_GetAuthRules.webp?t=1722349428)](https://documentation.despatchcloud.com/uploads/images/webp/Shipping/Shipping_SG_Advanced_GetAuthRules.webp?t=1722349428)

#### <span style="color: rgb(243, 103, 68);">**Installing a Courier Through the API**</span>

<span data-preserver-spaces="true">Now that you know the fundamentals of API user setup and couriers, let's guide you through creating your initial courier connection. Each API account can independently install couriers, ensuring that courier connections remain distinct to each account. This meticulous level of control empowers you to tailor your shipping configuration to the specific requirements of your business segments.</span>

##### **<span data-preserver-spaces="true" style="color: rgb(245, 89, 64);">To install a courier via the API, follow these steps:</span>**

1. <span data-preserver-spaces="true">Expand the "Account &amp; Management" folder, then navigate to "Register Auth" in the left-hand menu.</span>
2. <span data-preserver-spaces="true">Adjust the request URL, such as replacing the courier name with your desired choice. In this demonstration, we'll install DHL.</span>
3. <span data-preserver-spaces="true">Customise the request data according to the courier's specific requirements. You can refer to the previous section if you need guidance on this.</span>
4. <span data-preserver-spaces="true">Click the "Send" button at the screen's top left corner.</span>
5. <span data-preserver-spaces="true">Review the request response to determine whether the installation was successful or unsuccessful.</span>
6. <span data-preserver-spaces="true">To view the newly installed courier, proceed to <span style="color: rgb(243, 103, 68);">**Voila**</span> and select "API Accounts" from the left-hand menu.</span>
7. <span data-preserver-spaces="true">In the API account where you installed the courier, click the "View Registered Auths" button.</span>
8. <span data-preserver-spaces="true">You can confirm that DHL is listed in the installed courier's section, indicating a successful installation process.</span>

#### <span style="color: rgb(243, 103, 68);">📦 **Installing a Courier via API**</span>

<span data-preserver-spaces="true">Now that you know the fundamentals of API user setup and couriers, let's guide you through creating your initial courier connection. Each API account can independently install couriers, ensuring that courier connections remain distinct to each account. This meticulous level of control empowers you to tailor your shipping configuration to the specific requirements of your business segments.</span>

1. **Expand ‘Account &amp; Management’.**
2. **Select ‘Register Auth’.**
3. **Modify Request Data** with the courier’s specific details.
4. **Click ‘Send’.**
5. **Verify Response** for success.
6. **Check Installed Couriers** in <span style="color: rgb(243, 103, 68);">**Voila**</span> under "API Accounts."

[![](https://documentation.despatchcloud.com/uploads/images/webp/Shipping/Shipping_SG_Advanced_RegisterAuth.webp?t=1722349428)](https://documentation.despatchcloud.com/uploads/images/webp/Shipping/Shipping_SG_Advanced_RegisterAuth.webp?t=1722349428)


#### **<span style="color: rgb(243, 103, 68);">🤖 Creating Smart Rules</span>**

Smart shipping enables automated carrier selection based on predefined rules.

1. **Access the Smart Shipping Interface**.
2. **Create Rule Groups &amp; Smart Rules** based on shipping parameters.
3. **Optimise Costs &amp; Delivery Speeds** through automated courier selection.

📌 **For a step-by-step guide, check the** <a>**Smart Shipping Documentation**</a>**.**

<div id="bkmrk--7">---

</div>You’re now set up with Postman and <span style="color: rgb(245, 90, 64);">**![Voila.png](https://shipping-documentation.despatchcloud.app/uploads/images/gallery/2025-02/scaled-1680-/tT4voila.png)** </span>API!

 🚀 Happy shipping!